.png?width=200&height=150&name=campspotlogo2019%20(1).png)
Summary:
Campspot's built-in Point of Sale (POS) feature offers comprehensive functionality, and this article provides a detailed tour of the default landing page, Storefront. Learn about key features like the Products List, Starred Items, and Receipts, empowering you to streamline POS transactions and manage receipts effectively.
Point of Sale: Storefront
When navigating to the native Point of Sale available in your Admin Site, Storefront is your defaulted landing page once you select a Location (if applicable). This touch-screen-friendly interface enables you to conduct POS transactions efficiently. Here's what you'll find on Storefront:
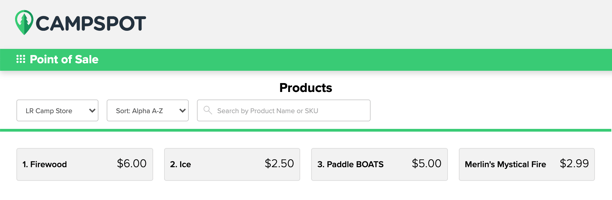
Products List
- The Products List displays all active products at the selected location, sorted alphabetically by default.
- Explore other sorting options such as Alpha Z-A, Price Low to High, and Price High to Low.
- Utilize the search field to filter products by name or SKU.
-
From this touch-screen friendly Product list, you can quickly and easily find a product to add a the POS shopping cart.
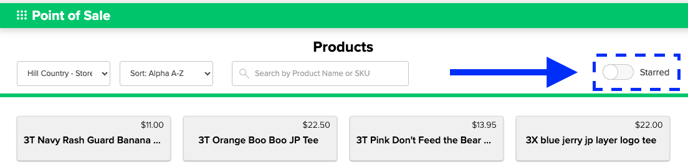
Starred Items List
Utilize the Starred icon button to prioritize top items, bringing them to the forefront.
Want to learn more? Click here to learn:
Receipts
The receipts section consists of two tabs:
- Current: Shows the current receipt being "built" as items are added to the POS shopping cart.
- History: Search for previous transactions.
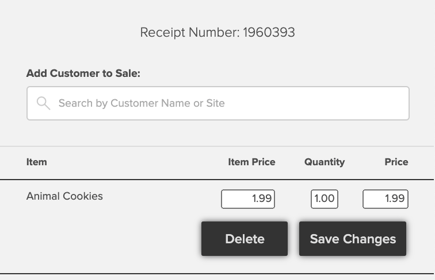
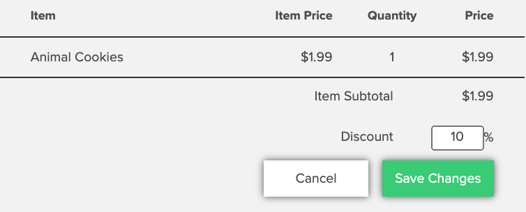
Current Receipt
Think of this as your POS shopping cart. Add items from the Products List, edit details, apply discounts, manage taxes, and ultimately check out to complete a transaction.
Attention: POS User Permissions
Some features discussed in the content below may requires additional User Permissions to be assigned to users of your Admin Site. Learn more about User Management here.
Edit Item Pricing
Click on an item once in your cart to edit price, quantity, and total price.
Applying a POS Discount
- Once items are added to your POS Cart, you have the ability to manually apply a discount by clicking on Discount below the line item charges.
- The discount is percentage based and only applicable to items qualifying for a discount.
- The discount will be automatically applied to all applicable items in the cart once applied.
POS Taxes
- Taxes are automatically applied to products configured as taxable.
- Tax can be exempted by selecting the Tax Exempt option. This option will exempt all tax on the receipt.
Want to learn more? Click here to learn more about:
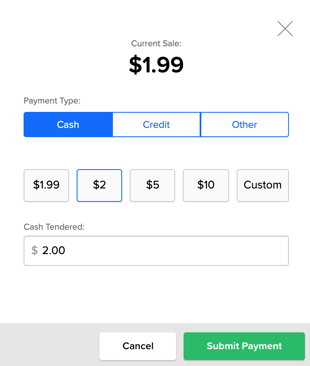
Checkout
The checkout button will prompt you to apply a payment to the Receipt, or POS shopping cart.
- Payment type options include cash, credit and other.
- An integrated credit card terminal that is paired with Campspot is required to use the credit payment method.
- Options in the Other payment type include check, certificate and charge to site.
- Upon applying a payment, you will be given the option to print a receipt. The print receipt button will prompt the web browser print interface to open and the receipt can be printed to any available printer.
Clearing Cart
The Clear button removes the current receipt so a new receipt can be created. Once a new receipt is created it cannot be deleted. All unpaid receipts can be recovered from the Receipts History tab.
Receipts History
The receipts history lists all paid and unpaid receipts created in the point of sale, sorted by the most recent receipts at the top. This section is used to look up historical receipts by using:
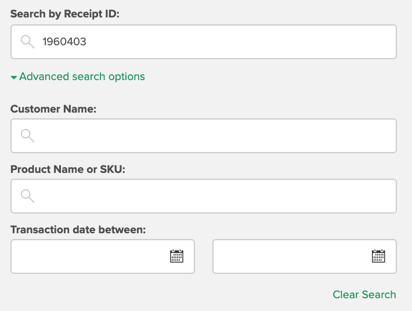
Search for a Receipt ID
The Search by Receipt ID: field searches for receipts by the receipt number. The receipt number is located at the top of a printed receipt.
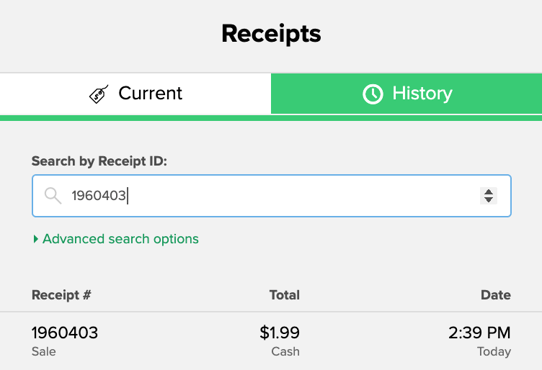
Advanced Search
The Advanced search options include customer name, product name or SKU and transaction date for searching when a receipt number is not available.