How to: Add a New Category to POS
Learn how to effortlessly enhance your Campspot POS by adding categories for streamlined product organization. Follow these step-by-step instructions for a seamless setup.
Summary:
Effortlessly enhance your Campspot POS by adding categories to streamline product organization. Follow these step-by-step instructions for a seamless setup.
Step-by-Step Instructions:
Step 1: Navigate to the Categories page
- Navigate to the Point of Sale.
- Click on the Admin tab.
- Click on the Categories page.

Step 2: Create Category
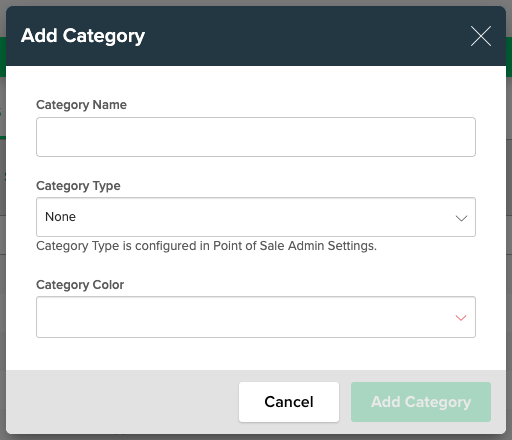
- Click the Add Category button.
- Complete the Category form by defining:
- Display Name: Enter the name of the category (e.g., Candy).
- Color: Choose a color to visually identify the category.
- Associated Financial Account: Select the financial account for money generated by the category's item sales.

- Click Save to create the category.
Note: A category must be created before it can be assigned to a POS product.
Edit Categories
To edit a category, simply click the category from the list and make any desired updates to the form. Click "Save Changes" to complete the update.
.png?width=200&height=150&name=campspotlogo2019%20(1).png)