.png?width=200&height=150&name=campspotlogo2019%20(1).png)
Summary:
Financial account mapping in Campspot is vital for organizing assets, liabilities, and revenue to ensure accurate financial reporting. This guide outlines the process of setting up and managing financial accounts within Campspot, including the creation and editing of custom accounts. Additionally, it provides insights into integrating Campspot with your accounting software for seamless data transfer. By following these steps, you can effectively manage their finances and generate detailed reports tailored to their specific needs.
Campspot's Financial Accounts
Financial accounts play a crucial role in Financial Account Mapping, aiding in the categorization of assets, liabilities, revenue, and more within Campspot's system. Properly setting up and mapping financial accounts is essential for generating accurate Journal Entry reports, which serve as the cornerstone for all financial reporting within Campspot.
Learn more! Check out these articles:
Campspot System Accounts
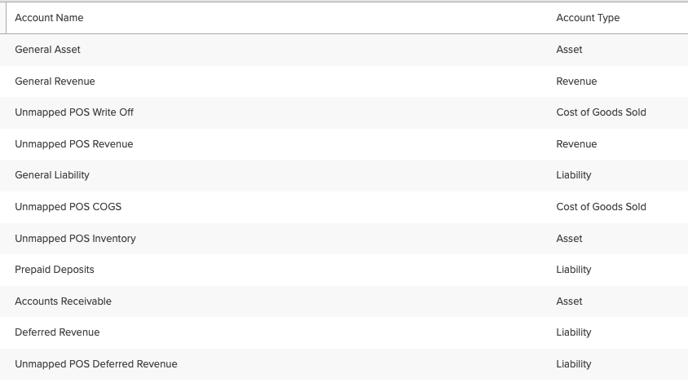
When your campground first begins using Campspot, 11 system accounts are automatically set up. Below is a screenshot of these 11 accounts:
View your existing accounts by:
- Navigating to Campground Setup
- Select the Accounting tab
- Click on Financial Accounts
Maintaining the existing/default account mapping will define how your park's performance reports. If your Financial Reporting preference is to discern revenue broken down more granularly, you will want to take advantage of creating Custom Financial Accounts (click here to learn how).
For example, if you'd like to see your Pet Fee revenue separate from your Tent Site revenue, you will need to create custom financial accounts and map the revenue sources to those accounts.
Need to Create Custom Accounts? Check out these resources:
Your Accounting Software and Campspot
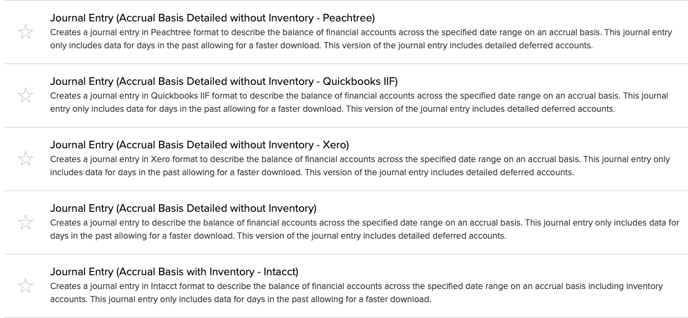
Ensure consistency between Campspot and your accounting software for smooth data transfer. Match account names and IDs precisely. Software-specific Journal Entry reports are available for:
- Peachtree
- Quickbooks (IIF for the desktop version of QB)
- Xero
- Intacct
- Sage Intacct
- Yardi
Note: If you use Quickbooks desktop version account names must match exactly. Click here for more information.
The image below shows some of the software specific Journal Entry reports that are available.