.png?width=200&height=150&name=campspotlogo2019%20(1).png)
Summary:
Setting up nightly add-ons in Campspot is an excellent way to enhance your campground's offerings. This guide provides a comprehensive walkthrough, from locating nightly add-ons to creating new add-on types, units, and seamlessly integrating them into site types. Ensure a smooth reservation experience by following these steps.
Uses:
- Diverse Offerings: Expand your campground's appeal by introducing new and exciting nightly add-ons, catering to various guest preferences.
- Consumer-Friendly Descriptions: Enhance the booking process by providing clear descriptions and invoice messages for nightly add-ons, ensuring guests are well-informed.
- Efficient Pricing Management: Streamline the reservation process by setting up add-on pricing, enabling a seamless booking experience for your guests.
New to Managing Nightly Add-ons? Check out these resources as well:

Step-by-Step Guide:
Step 1: Navigate to Unit Setup
- Navigate to Campground Setup from the primary navigation.
- Select Unit Setup from the secondary navigation.
Step 2: Add Nightly Add-On Type
- Choose Nightly Add-ons from the Add-On Category table.
- Click the Add Type button.

Step 3: Complete the New Add-On Type form
- Fill out the form to meet your specifications. Required fields will be indicated with a red asterisk. These must be filled out to complete this process.
- Click the Save Changes button.
| Is Active | Check this box to indicate that the site is active and ready for bookings. |
| Name |
Assign a easily identifiable Site Type Name. **Please Note: This name will be guest-facing.** |
| Grouping |
Select a grouping from pre-built options. During the check-out process, Add-ons are displayed in groups for easier browsing for both operators and guests. |
| Description | Paint a picture of the Site Type for both your guests and staff to understand the value of each of your unique Site Types. |
| Invoice Message | Enter an invoice message for the add-on in the Invoice Message section. This will show on the bottom of the invoice and will be emailed to the guest. |
| Add-On Assignment |
Select whether if specific units should be assigned or not by selecting:
|
| Accounting |
Select the Financial Accounts the revenue for this Site Type should be reported. Learn more by checking out the tip below. |
|
Main Image Slideshow |
Click the Choose photo to upload button to upload a photo to any of these categories. |
Step 4: Create Add-on Units
- Click on an Add-on Type from the list.
- Click the Add Add-on button.
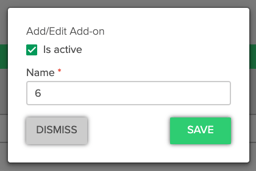
- Enter a name for the add-on unit in the Name field.
- Click the Save button.
- Repeat this process for each add-on unit of the add-on type.
New to Nighlty Add-ons? Check out the following article as well: