Reporting 101: Best Practices & Tips
Below, learn how to best use the Reporting feature in Campspot.
Reporting Tips & Best Practices
1) Star the reports you frequently pull to add them to your Favorited Reports list. Favorited Reports will show at the top of the list on the Reporting page.
.gif?width=600&name=ezgif.com-gif-maker%20(53).gif)
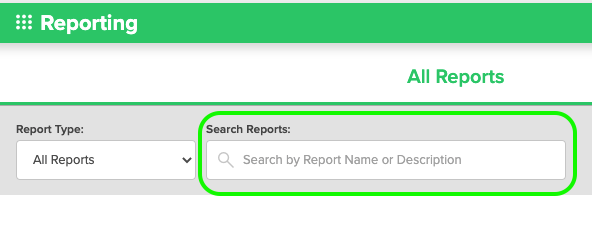
2) Use the search bar. The list of All Reports is most efficiently searched by using the Search Reports field at the top of the page. This search will return results from both the Title and the description of the report.
3) Reports must be downloaded. When you've located the report you want to view, you must download the report and open the downloaded file to view the data. Reports can be downloaded in two different files types - either PDF or CSV. PDF versions are best if you prefer to print your reports and CSV versions are best if you would like to sort and filter your data. Many reports are only available in CSV format.
4) Reports present data either by stay date or reservation origination date. The description of each report tells if the data covers stay dates or origination dates. The majority of the reports in Campspot pull data by stay date.
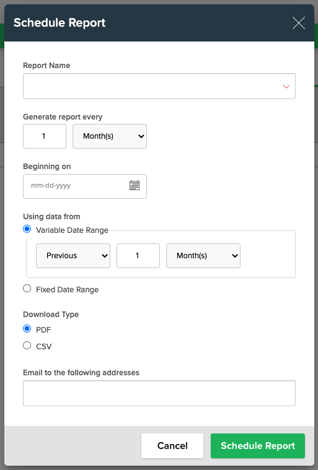
5) Schedule reports. Reports can be scheduled to send to send to an email of your choosing. Doing this eliminates the need for you to manually pull a report.
With Scheduled Reports you can set the report, how often it generates, the start date, the data time frame, and the file download type. To schedule reports go to Reporting > Scheduled Reports > Schedule Report 

To learn about some of the most commonly used reports [READ HERE].
.png?width=200&height=150&name=campspotlogo2019%20(1).png)