How to: Create a new POS Purchase Order
Learn how to efficiently navigate, create, and manage Purchase Orders to streamline your inventory processes and enhance order organization.
Summary:
This comprehensive guide unveils the step-by-step process of creating a new Purchase Order in Campspot's Point of Sale system. From navigation to status management and adding products, empower your inventory management with this in-depth overview.
Step-by-Step Instructions:
Follow these step-by-step instructions to efficiently create a new Purchase Order in Campspot's Point of Sale system:
Step 1: Navigate to Purchase Orders
- From the main navigation, click on Point of Sale.
- Click on the Inventory tab.
- Select the Purchase Orders page.

Step 2: Create Purchase Order
- Click the green Create button above the list of existing Purchase Orders.
- Complete the New Purchase Order form
New Purchase Order Form
A New Purchase Order will act as your guide from adding products to your order, printing an order summary to share with your vendor, and tracking the progress of an order.
Not only will this process help keep your orders organized, but it will add inventory to the system upon completion.
Below you will discover a deeper dive into the Purchase Order including:
How to use a New Purchase Order Form
When opening a New Purchase Order form you will see two sections:
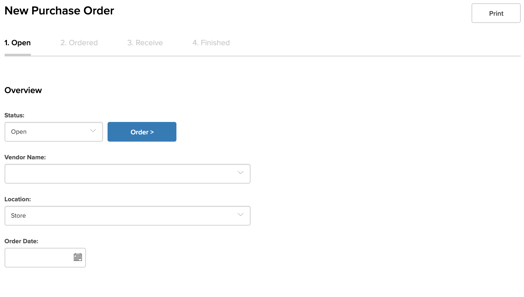
Parts of a Purchase Order: Overview
- Define Vendor Name, Location, and Order Date.
- Manually update the order status as you progress through the order process.
Want to learn more? Click here to learn more about:
Purchase Order Status: A Functional Tool
The status of a purchase order plays a pivotal role in tracking order progress. The status is updated as the order is organized, placed, and then accepted into your inventory.
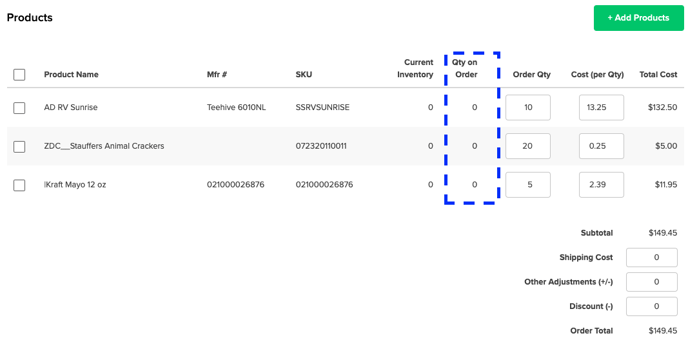
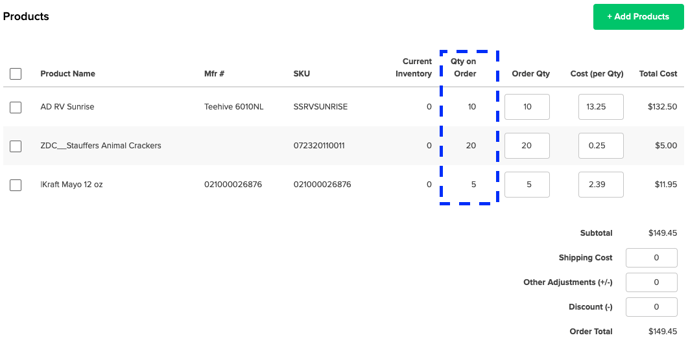
Explore the four order statuses and understand their functionalities (followed by examples of how each impacts the Product list of a Purchase Order):
| Open* | Save and edit later; add and edit products for future orders. |
| Ordered* |
|
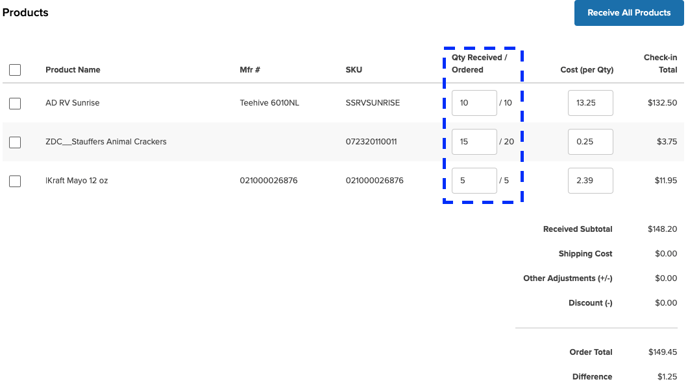
| Receive* |
|
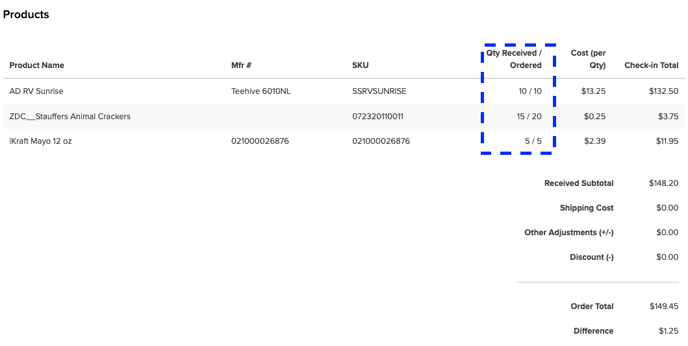
| Finished |
|
*Please note: The status of a purchase order can be changed freely between Open, Ordered and Received by selecting the desired status from the dropdown menu and saving the changes.*
Open
|
|
Ordered
 |
Receive
 |
Finished
 |
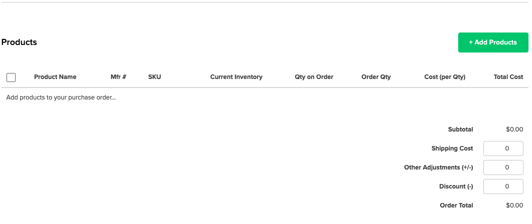
Adding Products
Efficiently add products to a purchase order by following these steps:
- Click the + Add Products button to initiate the process.
- Select the products and click the corresponding + Add button.
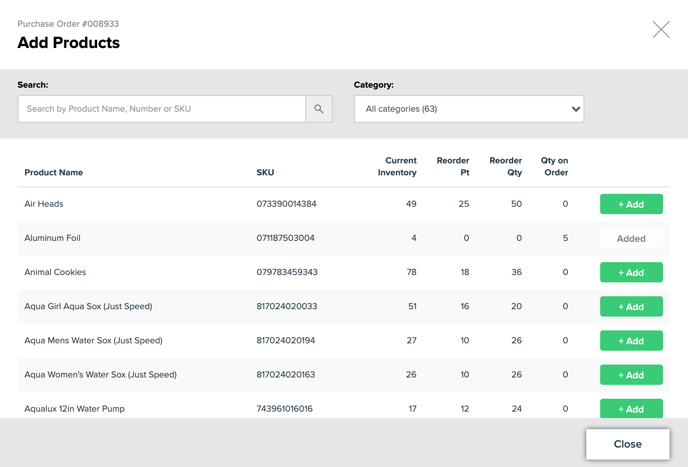
After a product has been added to a purchase order it is displayed under the products section of the purchase order where the order quantity and cost per unit can be adjusted.
Most Common FAQ:
Q: Can I edit a Purchase Order after setting it to "Finished" status?
No, once a Purchase Order is marked as "Finished," it becomes uneditable.
Q: Is it possible to adjust the final cost per quantity ordered during the "Receive" status?
Yes, the final cost per quantity ordered can be adjusted while in the "Receive" status.
Q: What happens if a product has negative inventory during order processing?
Options to replenish or ignore negative inventory are provided, impacting the cost of goods sold for the affected items.
Q: Can the status of a Purchase Order be freely changed between Open, Ordered, and Received?
Yes, the status can be adjusted freely by selecting the desired status from the dropdown menu and saving the changes.
Q: How does the "Ordered" status affect the POS Inventory At/Below Reorder Point report?
The "Ordered" status updates the product status on the POS Inventory At/Below Reorder Point report to indicate the products are on order.
.png?width=200&height=150&name=campspotlogo2019%20(1).png)
