How To: Customize Reservation's Automated Messaging with Tags and Links
Learn how to further customize some of Campspot's automated guest-facing messaging by inserting tags and links in your Messaging setup.
Summary:
Enhance your Admin Site email messaging by customizing messages with tags and links. This allows you to provide more information to your guests, giving them access to resources such as your park's policies, reservation details, and other essential information directly through email communications.
Uses:
-
Improve Guest Experience: Provide easy access to important policies.
-
Enhance Communication: Maintain transparency with guests regarding your park's policies and rules.
-
Avoid Redundancy: Link policies directly to reservation confirmation emails.
Enhancing Automated Messaging in Campspot
Simplify your communication process by integrating policy links directly into reservation emails. This feature provides guests with convenient access to your policies without cluttering communication channels or duplicating information. Campspot automatically sends email messages to your guests at various stages of the reservation process. From the initial booking to arrival to departure, you can customize the communication that goes to your guests.
You can access these messages by:
- Navigating to Campground Setup.
- Selecting the Properties tab.
- Clicking on Messaging.
To assist you with this, there are two features you can leverage to more efficiently provide additional information to your guests while limiting the length of an email by using:

Email Tags
Email tags allow you to customize your messaging templates with components like:
- Guest First / Last Name
- Reservation Details Link
- Policies Links (Refund, Terms & Conditions, Cancellation, Covid)
- Access Code Instructions (Available for parks with RemoteLock integration)
Policies Links
The policies you set up in your Admin Site (Policies tab of Properties in Campground Setup), are available to be included in your messaging templates via a link. Your guest can click on the link to easily view the policies directly from the email messages sent from your Admin Site during the booking process. Learn more about these policies here:
Steps to Add Tags:
- Navigate to Messaging on the Properties tab
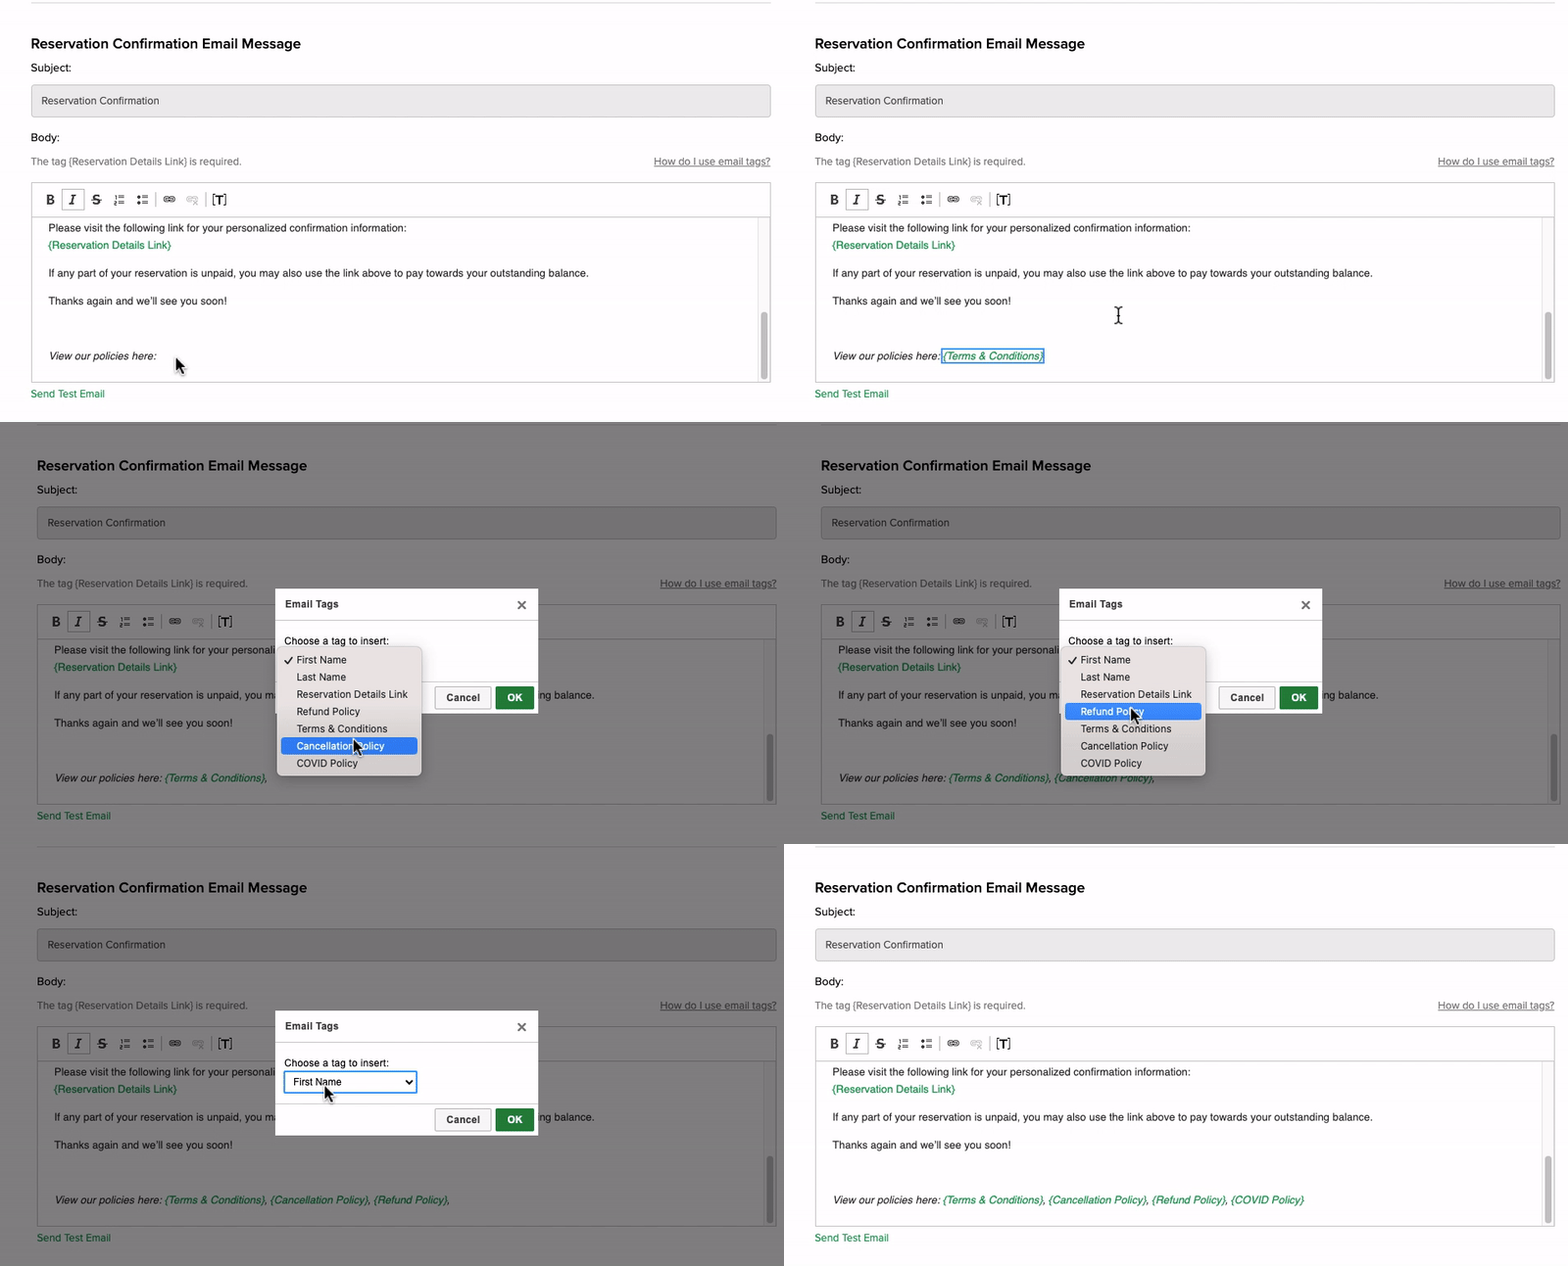
- Within the body of the message, click the [T], or token, button.
- A list of tags will show in a dialog box. The list of options to choose from are:

- A list of tags will show in a dialog box. The list of options to choose from are:
- Click on the link you would like to include, and click OK.
- Continue this process with any additional links you would like to include.
- When complete, click Save Changes in the bottom right corner.
The screen share gif below shows this process starting on the Messaging page (no sound).

Links
Adding links to your messaging allows you to provide specific details without overwhelming your guests. These links can direct guests to another site for more information on park rules, policies, or general information like hours and contact details. You can also include links that allow guests to send emails directly to your property or click-to-call phone numbers.
Steps to Add Links:
- Navigate to Messaging on the Properties tab
- Within the body of the message, click the
 button.
 - A Link dialog box will appear enabling you to insert your link. Complete the fields in the form.
- Click Ok to save changes and insert the link.

| Display Text | The text that will display within the message body, typically underlined and in blue. |
| Link Type |
Choose whether the link should be a URL, link to an anchor in the text, an email, or a phone number. Each selection provides additional setup options. |
.png?width=200&height=150&name=campspotlogo2019%20(1).png)